Upload Citations in PICO Portal
Supported File Formats
PICO Portal is compatible with some of the most popular tools and databases and allows you to import the search results in various file formats. We support the following sources from where you can export the search results and then import in PICO Portal.
- CINAHL (csv)
- CLINICALTRIALS (xml)
- COCHRANE (ris, BibTex)
- EMBASE (it uses generic ris)
- ENDNOTE (xml, enw)
- GENERIC (ris, BibTex)
- OVID Engine (ris, cml)
- PICO Portal (Excel, csv)
- PUBMED (PMID, ris, nbib, xml, csv)
- Web of Science (ciw, BibTex)
Upload Citations
The Upload page appears automatically when you create a new project. However, you can upload articles by opening the project and clicking Settings > Upload.
PICO Portal allows you to upload citations in various file formats. You can also use the PICO Portal template to manually add entries and upload them on the portal.
In this example, we searched for Melanoma Skin Cancer on the PubMed site and downloaded the search results PMID. We will upload the file on PICO Portal for it to pull all the search results.
Perform the following steps to upload articles.
- On the list of projects page, click the Upload Articles button available at the right of the project name. Alternatively, you can click the project name and click Settings > Upload. The Upload page appears.
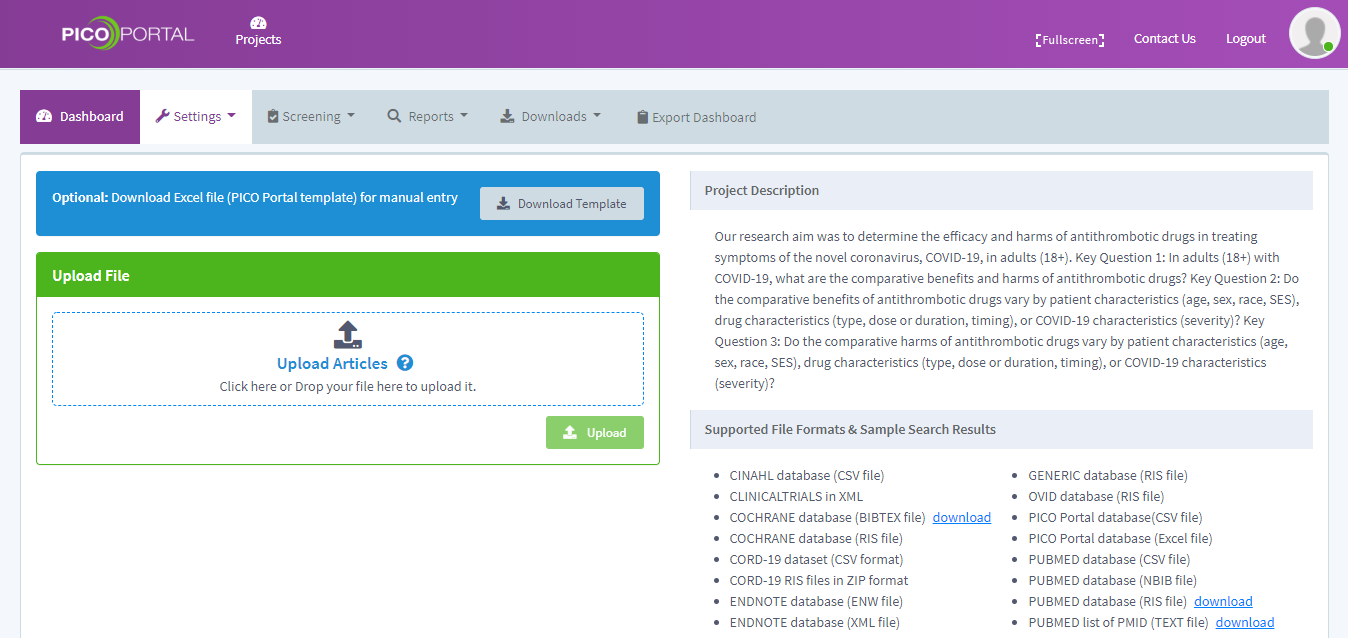
- In the Upload File section, click the Upload Articles link and select the required file.
tip
You can also drag and drop your file in the Upload File section.
- Once you have added your file, the name of the file appears in the box.
- Click the Upload button. The Select Source File Format dialog box appears.
- Select the file format. We have downloaded the file from PubMed, hence we will select the PUBMED option.
- Click Submit. The upload status appears at the bottom of the page.
- After the articles are uploaded successfully, a tick appears under the Upload Status column.
The uploaded articles are added to the View Articles tab. You can now start screening the articles.
View Upload Status
When you upload articles, they get uploaded to the servers in a batch. You can view the status of the upload and identify whether all articles are uploaded or there were any problems/issues identified by the system.
Perform the following steps to view the status of your upload.
- Navigate to the project and click Settings > Upload. The Upload Articles page appears.
- Scroll down to the grid that displays the uploaded batches as shown in the following figure.
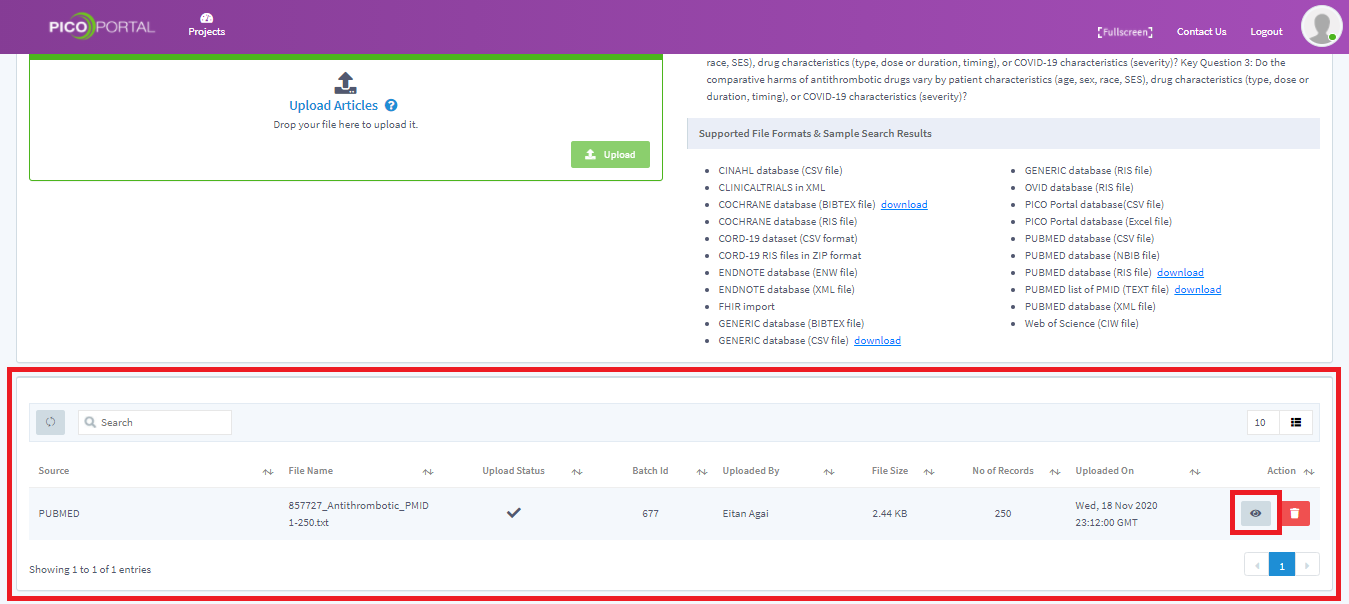
The Grid displays the following information:
- Source - Displays the source from which the articles were extracted.
- File Name - Displays the name of the file that you have uploaded.
- Upload Status - Displays the current status of the upload. When the tick icon appears, it means that the upload is completed.
- Batch ID - Displays the unique batch ID associated with each upload.
- Uploaded By - Displays the name of the member who uploaded the file.
- File Size - Displays the file size.
- No of Records - Displays the number of records imported in PICO Portal.
- Uploaded On - Displays the date and time of the upload.
- View Details - Click the eye icon to view the upload details.
- Delete Batch - Click the bin icon to delete the batch.
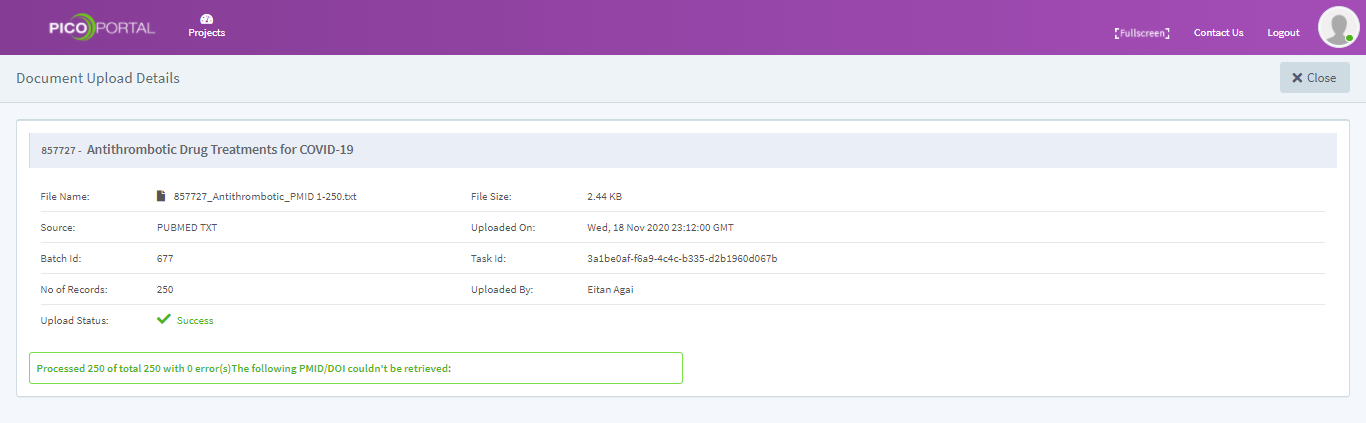
If the number of records does not match with the records you wanted to import then, in this case, there would be some error in the import process. To view more details about the error or the records that were not imported, click the eye icon.
Delete an Uploaded batch
When you upload a file, PICO Portal imports all the citations from the source, remove the duplicates, and highlights the keywords that help you in screening the citations. You would want to delete the imported batch for one of the following reasons:
- If you have imported the same file twice
- If you have imported the incorrect file
- If the import process has generated an error
Perform the following steps to delete the batch.
- Navigate to the project and click Settings > Upload. The Upload Articles page appears.
- Scroll down to the grid that displays the uploaded batches.
- Click the Bin icon available next to the batch that you want to delete. The Delete Batch confirmation message appears.
- Click Delete if you want to delete the batch.