Create Project in PICO Portal
If you have signed in for the first time, you will be asked to start or join a new project. However, if you have been invited to a project by the project owner, then in such a case, on accepting the invite, the project appears on the Projects dashboard when you sign in for the first time. In case you have not been invited and have signed up and logged in for the first time, you will be asked to create a new project.
You can create multiple projects based on your review goals. For example, if you want to import all the articles that relate to Antithrombotic Treatments in COVID-19 and want the reviewers to work specifically on this, then you can create a new project for this requirement. Similarly, you can create and configure projects as per the review goals.
After you have created your project, you can invite team members, upload articles, add keywords and tags, and start a single or a dual review.
Perform the following steps to create a new project.
- Log in to the PICO Portal.
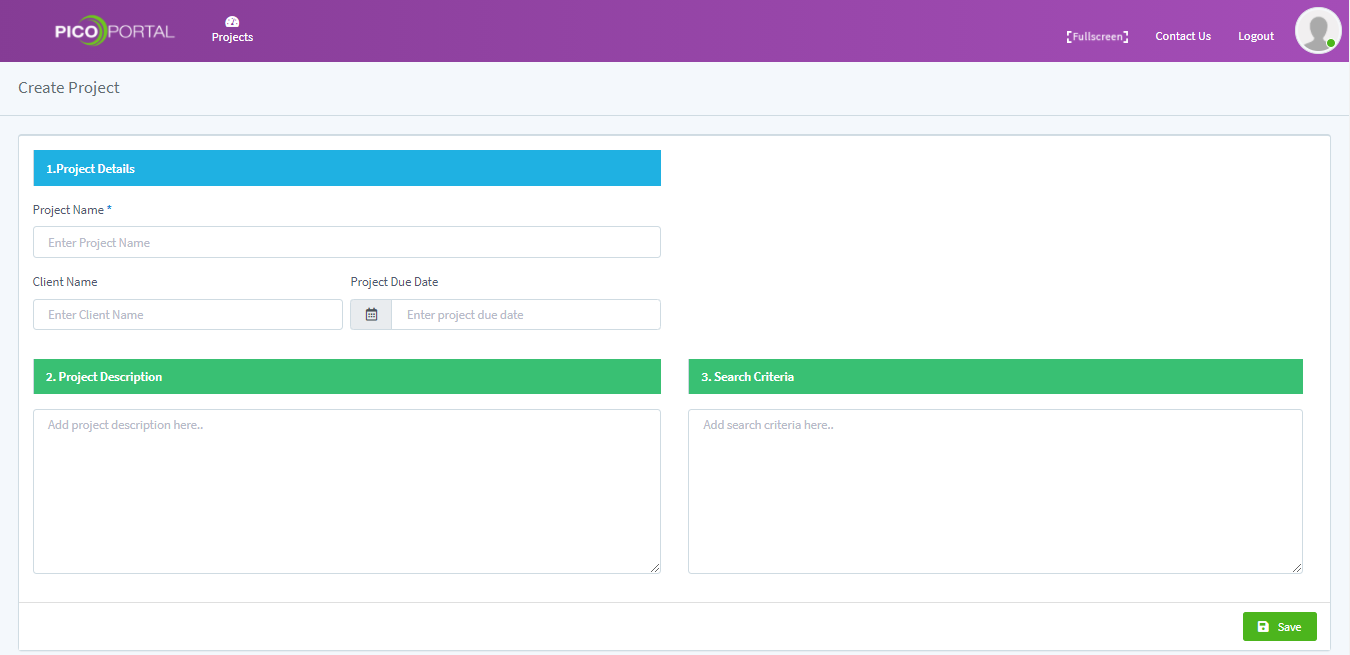
- On the PICO Portal homepage, click the Create Project button. The Create Project page appears.
- In the Project Name field, enter a suitable name for your project; for example, Antithrombotic Treatments in COVID-19. This is the only required field while creating a project. You can modify these parameters as and when required.

- In the Project Description field, enter a description for the project. We recommend that you add the project description as it is being displayed at the dashboard and will help other reviewers know more about the project. This is a mandatory field.
- In the Search Criteria field, enter the search criteria. We recommend that you add the search criteria for future reference. Search criteria helps PICO Portal understand important keywords that will improve the AI prediction.
tip
If you do not have the project details at this stage, you can leave the fields blank. The project will be created. You can always update these fields using the Setup tab available in the project.
- Click Save. The project is successfully created and the project page appears as shown below.
Video Tutorial
Click here to view a video tutorial about creating a new project.